
3 Tips for Creating a Wall Plates Gallery
Posted by APARNA RAMACHANDRAN

So you have fallen in love with wall plates, & must have them ALL!
The only problem... how to choose wall plates that'll make a set? And how/where do you put them up?

So here we are! Sharing 3 tips on creating the perfect wall plates gallery.
1) Choose the wall where you'll plan the display
Pick a wall that has enough light so you can see the beautiful designs, without too much direct light that your plates create a glare.

The best areas for wall plates decor according to Better Homes & Gardens is in your living room, by the couch or the cabinet; framing a doorway; the dining room; the kitchen or even at the entrance.
You see, wall plates are so versatile that it always helps to first pick a wall, so you can then work specifics.

2) Picking out plates that'll create the collage
📍 Numbers --> Are you planning your wall plates decor to be part of a larger gallery wall? Or will it be the entire gallery wall? Or is it infact a smaller collection that you are intending to showcase? Answering these questions will help evaluate the number of plates we'd require for the chosen wall.
Pro tip: Plan your wall plate display such that it is 2/3 the size of the furniture below it. So for instance, if you have a 12 ft. sofa, your wall plate gallery should only take up 8 ft.

📍 Colours --> You want to choose colours that either complement or highlight the home decor you already have. To complement your current home decor, go with colours similar to your existing palate. For instance, if you have reds & oranges in your home, keep your wall plates decor in warm tones so they don't contrast too starkly with your home decor.

Another strategy is to make your wall decor really stand out by using some contrasting colors in your wall plates decor. An example of this would be if you have furniture that is more neutral, you could choose wall plates in bright blues so they stand out.
Pro tip: Bring the look together adding a throw or pillow of matching colours.

📍 Sizes --> While same sizes create symmetry, different sizes lend depth & drama to your composition.

So if its impact & not uniformity, that you are looking for - play with sizes.

3) Readying the plates for your wall.
Now, the easiest way to imagine how your plates are going to look like on the wall, is to simply lay them out on the floor. Try various arrangements, for these will not only help visualize the space, but also how different plates go together.

Once you've zeroed in on your favourite layout, click a picture - for this will now serve as reference!

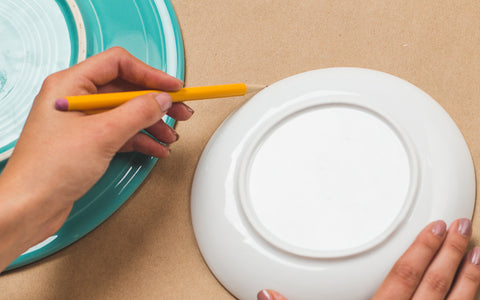
Next trace the plates on paper & make cut outs of each plate.
Then tape these paper cut-outs on the wall, in the arrangement you've chosen. This will not only give you a great visual of where the plates will hang - but also allows you scope to make any adjustments.

Once you have them where you want, its all about drilling, and hanging!